Window Sizing & Configurations
How to Accurately Measure for Aluminium Sliding Windows: Step-by-Step Replacement & New Build Guide
By Sheng Xu · 25 September 2026
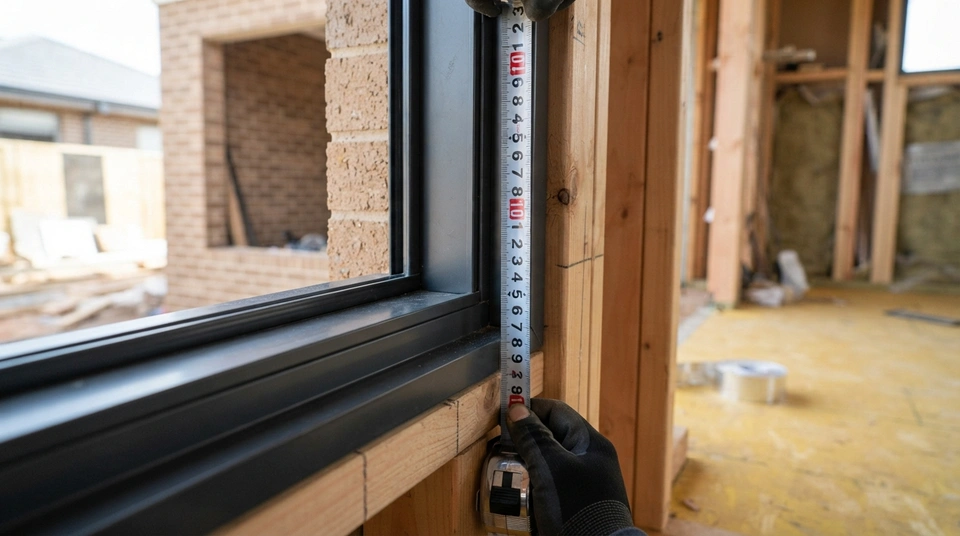
AI-generated illustrative image. Not a product test, certification record or project evidence.
Accurately measuring for aluminium sliding windows requires following two distinct technical pathways: for new builds, measure the structural stud rough opening across three points (top, middle, bottom for width; left, centre, right for height), deduct 60mm in both dimensions to determine the bare frame size with pre-fitted reveals, and verify diagonal squareness within 3-5mm. For replacements, measure the internal clear reveal-to-reveal opening or existing bare frame, deducting 10mm to 15mm clearance to ensure the new frame slides into the existing perimeter without breaching flashings or disturbing external brickwork.
Accurately measuring for aluminium sliding windows is the single most critical task in the entire glazing workflow. Unlike timber doors or timber-framed sashes that can be planed down on site to fit a tight opening, an aluminium sliding window is a rigid, factory-assembled structural unit. Once extruded, cut, powder-coated, and glazed with double-glazed insulated glass units (IGUs), its external dimensions cannot be altered. If a manufactured window is even 5 millimetres too large for an opening, resolving the clash requires costly structural demolition of framing studs or a complete factory rebuild.
Professional glaziers and building certifiers recognize that measuring for windows is not a single generic procedure. The methodology splits into two fundamentally separate engineering pathways: measuring raw stud rough openings for new builds or extensions, versus measuring existing timber reveals and masonry cutouts for retrofit replacements. Conflating these two workflows is the leading cause of costly ordering mistakes across Australian residential building sites.
Universal Sizing Principles: The 3-Point Rule and Notation Discipline
Regardless of whether you are working on a brand-new architectural build or replacing dated 1980s sliders in a brick veneer home, every accurate site survey depends on three foundational principles:
First is the Three-Point Measurement Rule. You must never take a single measurement across an opening. Structural framing studs and masonry jambs are rarely laser-straight; vertical studs frequently bow inward or outward at mid-span under roof truss loads, and timber sills can sag under framing settlement. Measure the horizontal width across three distinct locations: near the top, across the exact middle, and near the bottom. Repeat the process for vertical height: measure along the far-left jamb, down the exact center, and along the far-right jamb.
Second is the Smallest Measurement Invariant. When ordering, always base your deductions and manufacturing dimensions on the smallest of the three recorded figures. If an opening measures 1205mm at the top, 1198mm at the center, and 1202mm at the bottom, your reference dimension is 1198mm. A window manufactured to fit the smallest restriction can easily be aligned, packed plumb, and weatherproofed with perimeter backing rods and expanding foam; a window manufactured to the largest dimension will bind at the narrow point.
Third is Dimension Notation Discipline. Australian window manufacturers universally document sizes as Height followed by Width (H x W)—for instance, 1200mm H x 1810mm W. However, because some European trade systems and online ordering portals specify Width x Height (W x H), always write down your dimensions with explicit letter prefixes: 'H: 1200mm, W: 1810mm'. This simple precaution prevents inverted factory fabrications.
Pathway 1: Measuring for New Builds (Stud Rough Openings)
In new construction—whether timber stud framing or light-gauge structural steel framing—the installer measures the raw rough opening (RO) prior to the installation of wall sarking, external cladding, or interior plasterboard linings. The rough opening is the structural space bounded by the vertical jack studs on either side, the horizontal sill trimmer below, and the structural overhead lintel above.
To measure a new build stud opening correctly, follow this sequence:
Step 1: Using a rigid steel tape measure, record the distance between the inside faces of the structural jack studs at the top, middle, and bottom. Record the smallest width.
Step 2: Measure vertically from the top surface of the horizontal sill trimmer to the underside of the structural overhead lintel on the left, center, and right. Record the smallest height.
Step 3: Apply the Australian Standard deduction formula. In Australian residential construction, aluminium windows are supplied with pre-fitted timber reveals (typically 19mm primed pine). Major manufacturers, including Dowell and Wideline, establish the universal relationship: Stud Rough Opening = Bare Aluminium Frame Dimension + 60 millimetres.
For example, if your architectural schedule calls for a standard 1218 sliding window (bare frame 1200mm H x 1810mm W), the framing carpenters must build a stud rough opening of 1260mm H x 1870mm W. Conversely, if you measure an existing rough opening of 1260mm H x 1870mm W, you order a 1200mm x 1810mm bare frame unit.
This 60 millimetre total allowance is engineered intentionally: the two 19mm timber reveal liners occupy 38 millimetres of the opening width and height. The remaining 22 millimetres provides approximately 10 to 12 millimetres of shimming clearance beneath the sill reveal and behind each side jamb reveal, plus a mandatory 12 to 15 millimetre settlement gap beneath the overhead lintel to prevent structural roof loads from bearing down onto the window frame.
Step 4: Measure the wall framing depth to specify the correct timber reveal width. Measure the timber stud depth (70mm or 90mm), add the exterior cavity depth (35mm to 40mm for standard brick veneer), and add the internal plasterboard thickness (10mm). A 90mm stud in standard brick veneer requires the universal 138 millimetre reveal depth; a 70mm stud in lightweight weatherboard requires a 100 millimetre reveal.
Pathway 2: Measuring for Replacement and Retrofit Projects
When replacing failing, draughty, or single-glazed sliding windows in an established home, the structural framing studs are completely concealed behind internal plasterboard architraves, external brickwork, and flashing membranes. Renovators must choose between two distinct replacement strategies:
Method A: Full-Frame Tear-Out Replacement
In a full-frame tear-out, the interior timber architraves are removed, the original timber reveal liners are cut away from the studs, and the entire window assembly is extracted back to the raw wall framing. This is the optimal technical approach for total replacement because it allows installers to inspect framing for moisture damage, install new high-performance building wraps and sill flashings, and fit a modern thermally broken window with brand-new factory-fitted reveals.
To measure for a full tear-out: carefully pry back a section of internal timber architrave at the side and head to expose the structural timber stud and the underside of the lintel. Measure between the framing studs exactly as you would for a new build stud opening, taking the three-point measurements and deducting the standard 60 millimetres to determine the new reveal-fitted window frame size. Verify external brick-to-brick dimensions to ensure the new frame will slide past the external brickwork reveal without obstruction.
Method B: Reveal-Fit Insert Replacement
If the existing internal timber reveals are structurally sound, completely free from rot or termite damage, and securely anchored to the framing, a reveal-fit insert replacement avoids disturbing internal plasterboard and external brickwork. In this approach, only the old aluminium frame is unscrewed and removed, leaving the existing timber reveal box intact.
To measure for an insert replacement: measure the clear opening between the inside faces of the existing timber reveals. Measure width at the top, middle, and bottom; measure height from the inside face of the sill reveal to the underside of the head reveal at the left, center, and right. Record the smallest measurements.
Deduction formula for insert replacement: deduct 10 to 15 millimetres from the smallest width and 10 to 15 millimetres from the smallest height. This provides a clean 5mm to 7mm perimeter clearance on all four sides. The new aluminium frame (ordered without timber reveals) is slid directly inside the existing timber reveal opening, leveled on composite packers, fastened through the side jamb extrusions into the timber, and sealed with high-grade neutral-cure silicone and perimeter closing angle trims.
Checking Squareness: The Diagonal Variance Test
A rough opening or reveal box can exhibit identical width and height measurements at all six points while being severely distorted out of square. Over decades, ground movement, seasonal soil expansion, and timber shrinkage cause rectangular wall openings to shift into parallelograms.
If you install a rigid, square aluminium sliding window into a parallelogram-shaped opening, the sliding sash will never close flush against the side jamb. The top corner will strike the frame while the bottom corner remains open by several millimetres, admitting draughts, traffic noise, and wind-driven rain.
To verify squareness, conduct the corner-to-corner diagonal check across the opening:
Step 1: Hook your steel tape onto the top-left internal corner and measure diagonally down to the bottom-right corner. Note this dimension as Diagonal A.
Step 2: Hook your tape onto the top-right internal corner and measure diagonally down to the bottom-left corner. Note this dimension as Diagonal B.
Step 3: Calculate the difference between Diagonal A and Diagonal B. In Australian building practice, the diagonal variance determines the corrective action required:
Variance 0mm to 3mm: The opening is square within exceptional tolerance. Proceed with standard ordering and shimming.
Variance 3mm to 5mm: The opening is within normal building tolerance. Standard plastic composite packers placed under the corners during installation will comfortably level and square the frame.
Variance greater than 5mm: The opening is significantly out of square. For new builds, the framing carpenters must adjust the jack studs and re-brace the opening before ordering. For retrofit replacements where structural framing cannot easily be altered, you must determine the 'maximum true rectangle' that will fit inside the skewed opening by deducting an additional 5mm to 10mm from your ordering dimensions, planning for wider internal cover trims to conceal the perimeter gap.
Verifying Level and Plumb: Preventing Track Distortion
In addition to measuring dimensions and diagonal squareness, the installer must inspect the physical level of the sill trimmer and the vertical plumb of the jambs using a minimum 1200 millimetre precision spirit level or a calibrated cross-line laser.
Sliding windows are uniquely intolerant of unlevel sill supports. While casement and awning windows carry their sash weight on side or top perimeter hinges, an aluminium sliding sash concentrates its entire weight (often 30 to 50 kilograms in double-glazed configurations) onto two small roller wheels travelling along the bottom sill track.
If the sill trimmer bows downward in the middle or slopes from left to right, gravity pulls the sliding panel downhill. The sash will roll open or slam shut on its own, and the vertical meeting stiles will fail to interlock squarely, allowing air and water infiltration. During the initial measuring survey, identify any sill sag in advance so that rigid, non-compressible packers can be specified directly beneath the center mullion and the end jambs.
Frequently Asked Questions
Should I measure from the existing window frame or the timber reveal?
For a full-frame tear-out replacement where existing reveals are removed back to bare wall studs, measure between the rough timber framing studs. For an insert replacement where sound existing timber reveals are retained, measure the clear daylight opening between the inside faces of the existing timber reveals at the narrowest points, then deduct 10mm to 15mm for installation clearance.
What should I do if my window opening is out of square by more than 5mm?
If corner-to-corner diagonal measurements differ by more than 5mm, the opening has settled into a parallelogram. In new builds, framing carpenters must re-plumb and brace the jack studs before window installation. In retrofit replacements, calculate the maximum true rectangle that fits within the skewed opening by deducting an additional 5mm to 10mm, planning for wider internal timber architraves to cover the perimeter gap.
Why must window dimensions always be measured across three points?
Structural studs and sill trimmers frequently bow inward or outward under building loads. Measuring width at the top, middle, and bottom, and height at the left, center, and right identifies any mid-span stud deflection. Always use the smallest recorded dimension to prevent the manufactured window binding during installation.
Is window size written as height first or width first in Australia?
Australian window manufacturers standardize on Height followed by Width (H x W)—for example, 1200mm H x 1810mm W. To eliminate any ambiguity with ordering portals or European sizing conventions, always prefix dimensions explicitly with letters: H: 1200mm, W: 1810mm.
Pre-Order Verification Checklist
Before transmitting your window schedule to the manufacturer or placing an online order, verify your measurements against this final checklist:
1. Did you measure both width and height at three separate points (top, middle, bottom and left, centre, right)?
2. Did you base all calculations on the smallest recorded measurement?
3. Did you check corner-to-corner diagonals to confirm variance is 5mm or less?
4. Did you apply the correct pathway deduction—deducting 60mm from stud openings for new builds, or 10-15mm from clear reveal openings for retrofit inserts?
5. Did you measure total wall depth to specify the matching timber reveal size (e.g., 100mm for 70mm weatherboard, 138mm for 90mm brick veneer)?
6. Have you verified that opening sizes align with standard manufacturer modular codes to avoid custom fabrication surcharges?
7. Are all dimensions explicitly labeled with Height first, followed by Width?